4. Backtracking 1-step worksheet LaTeX
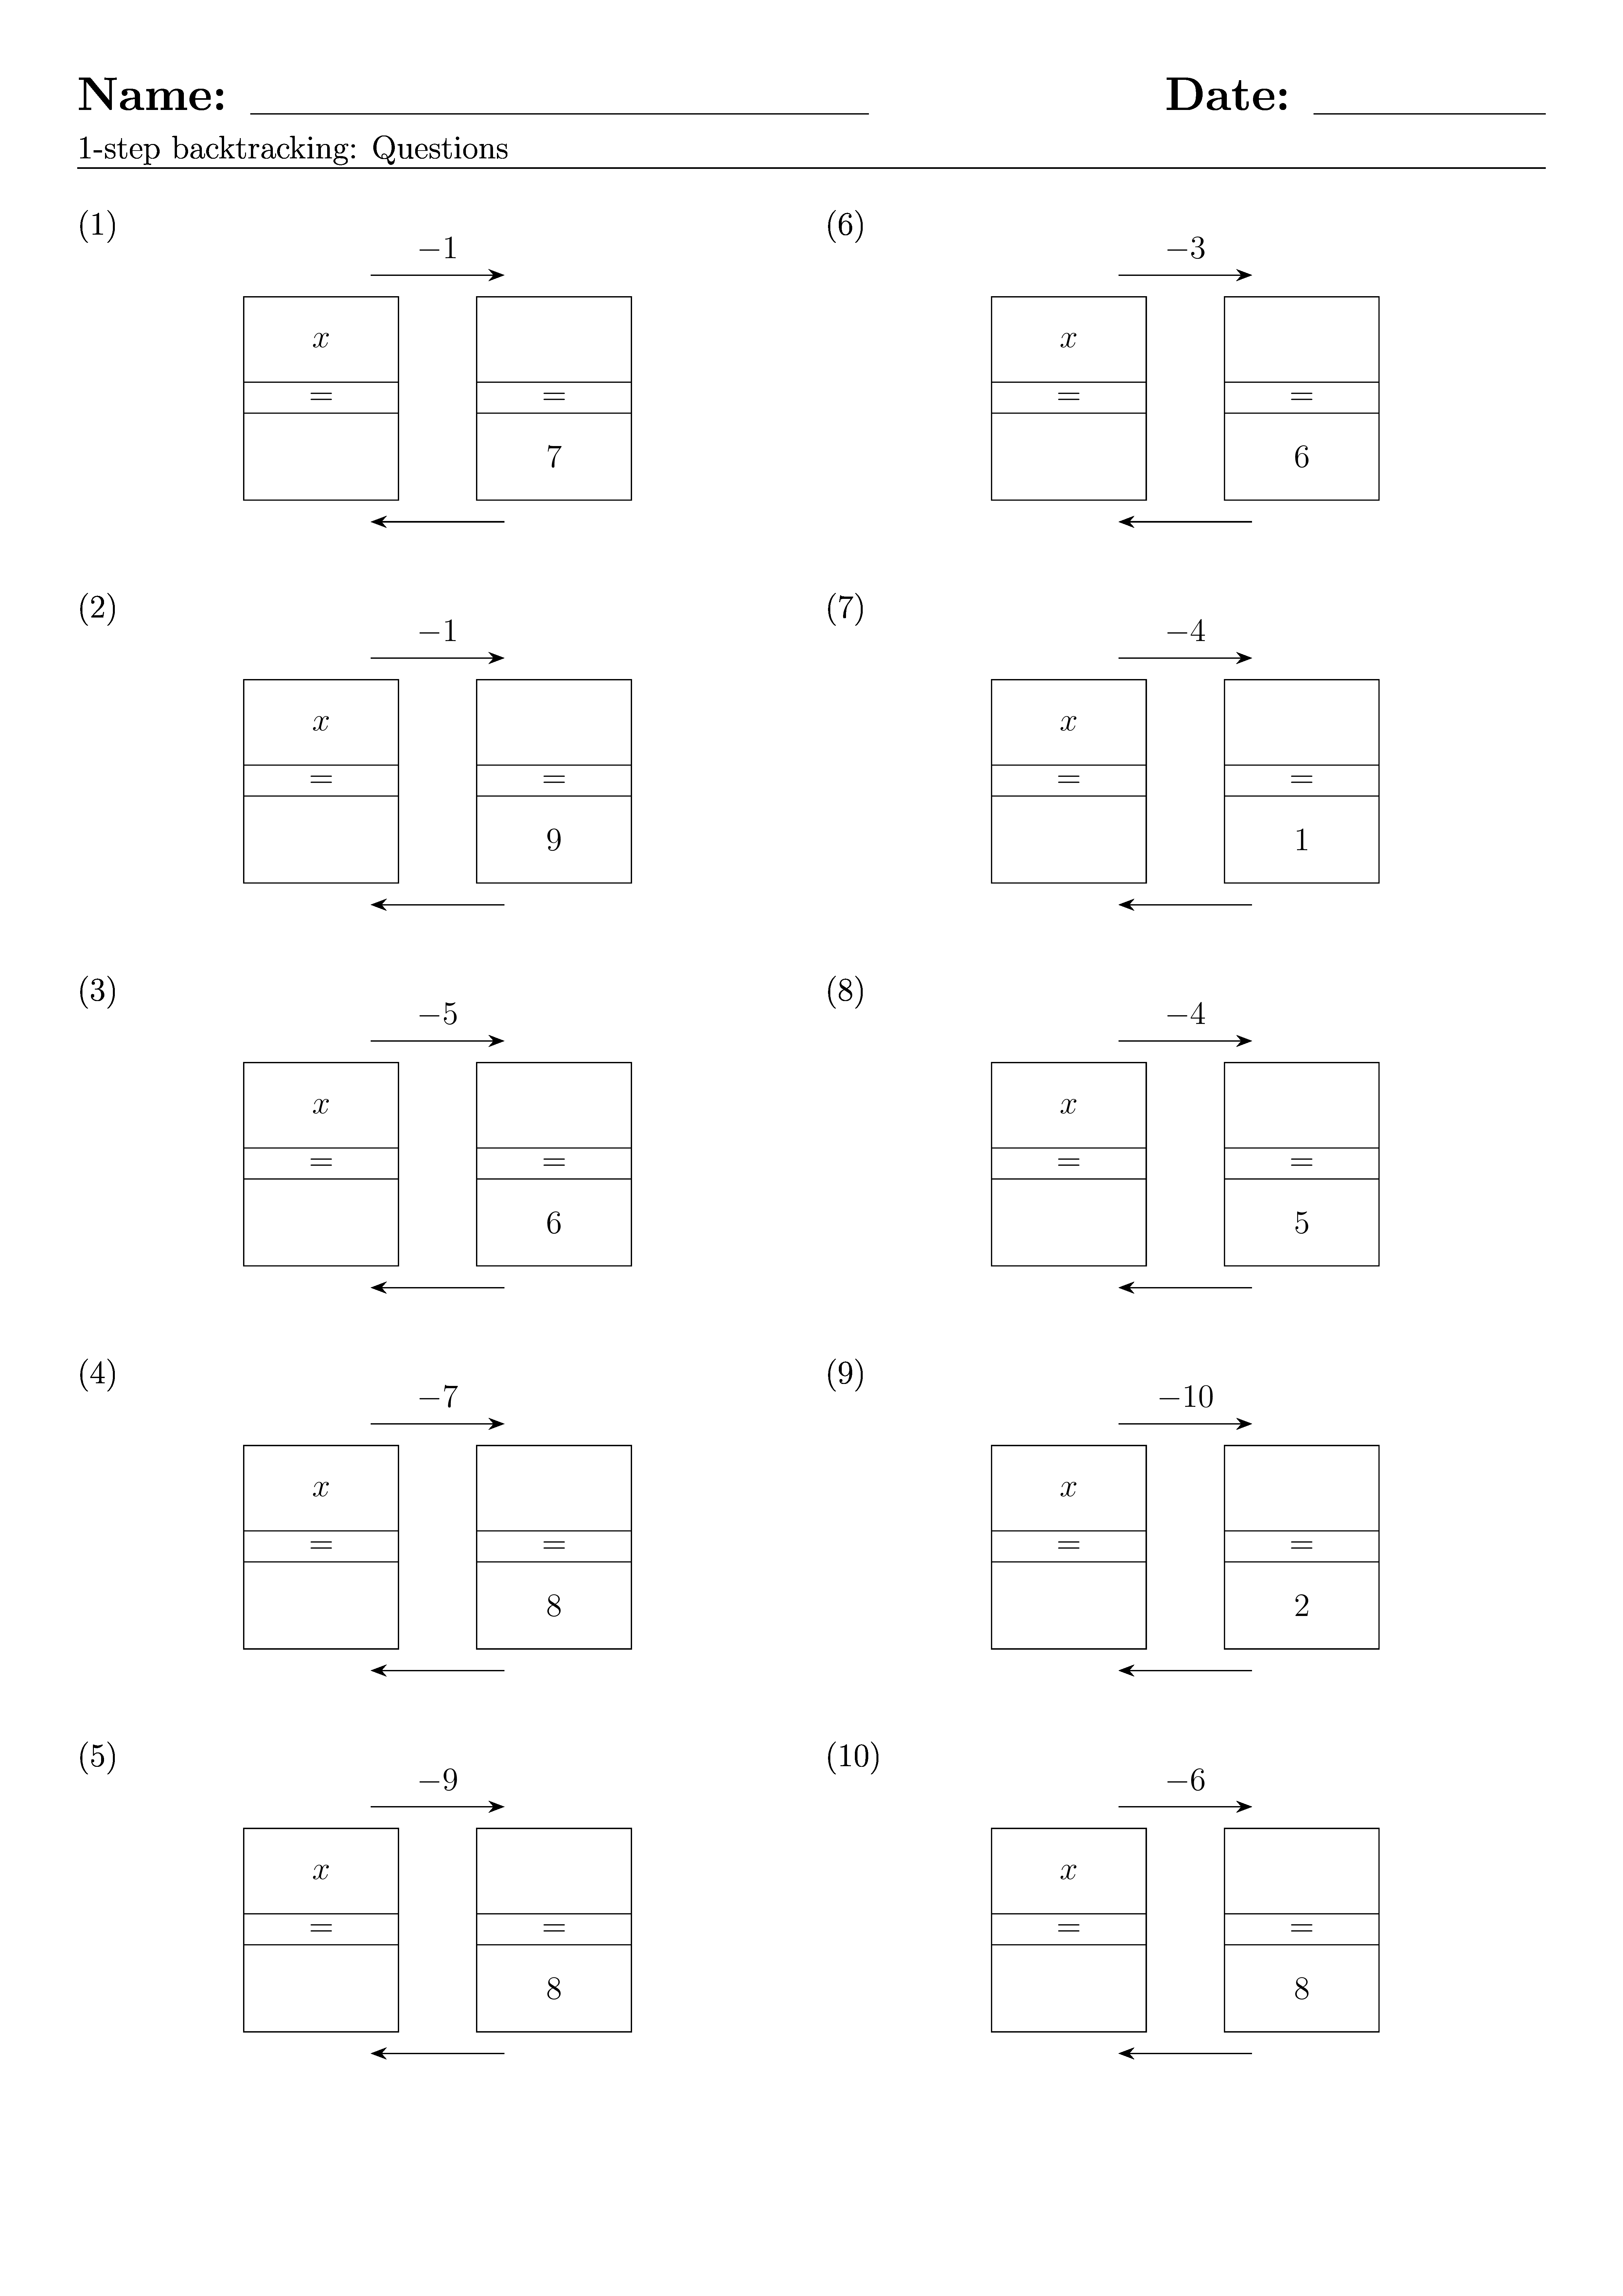
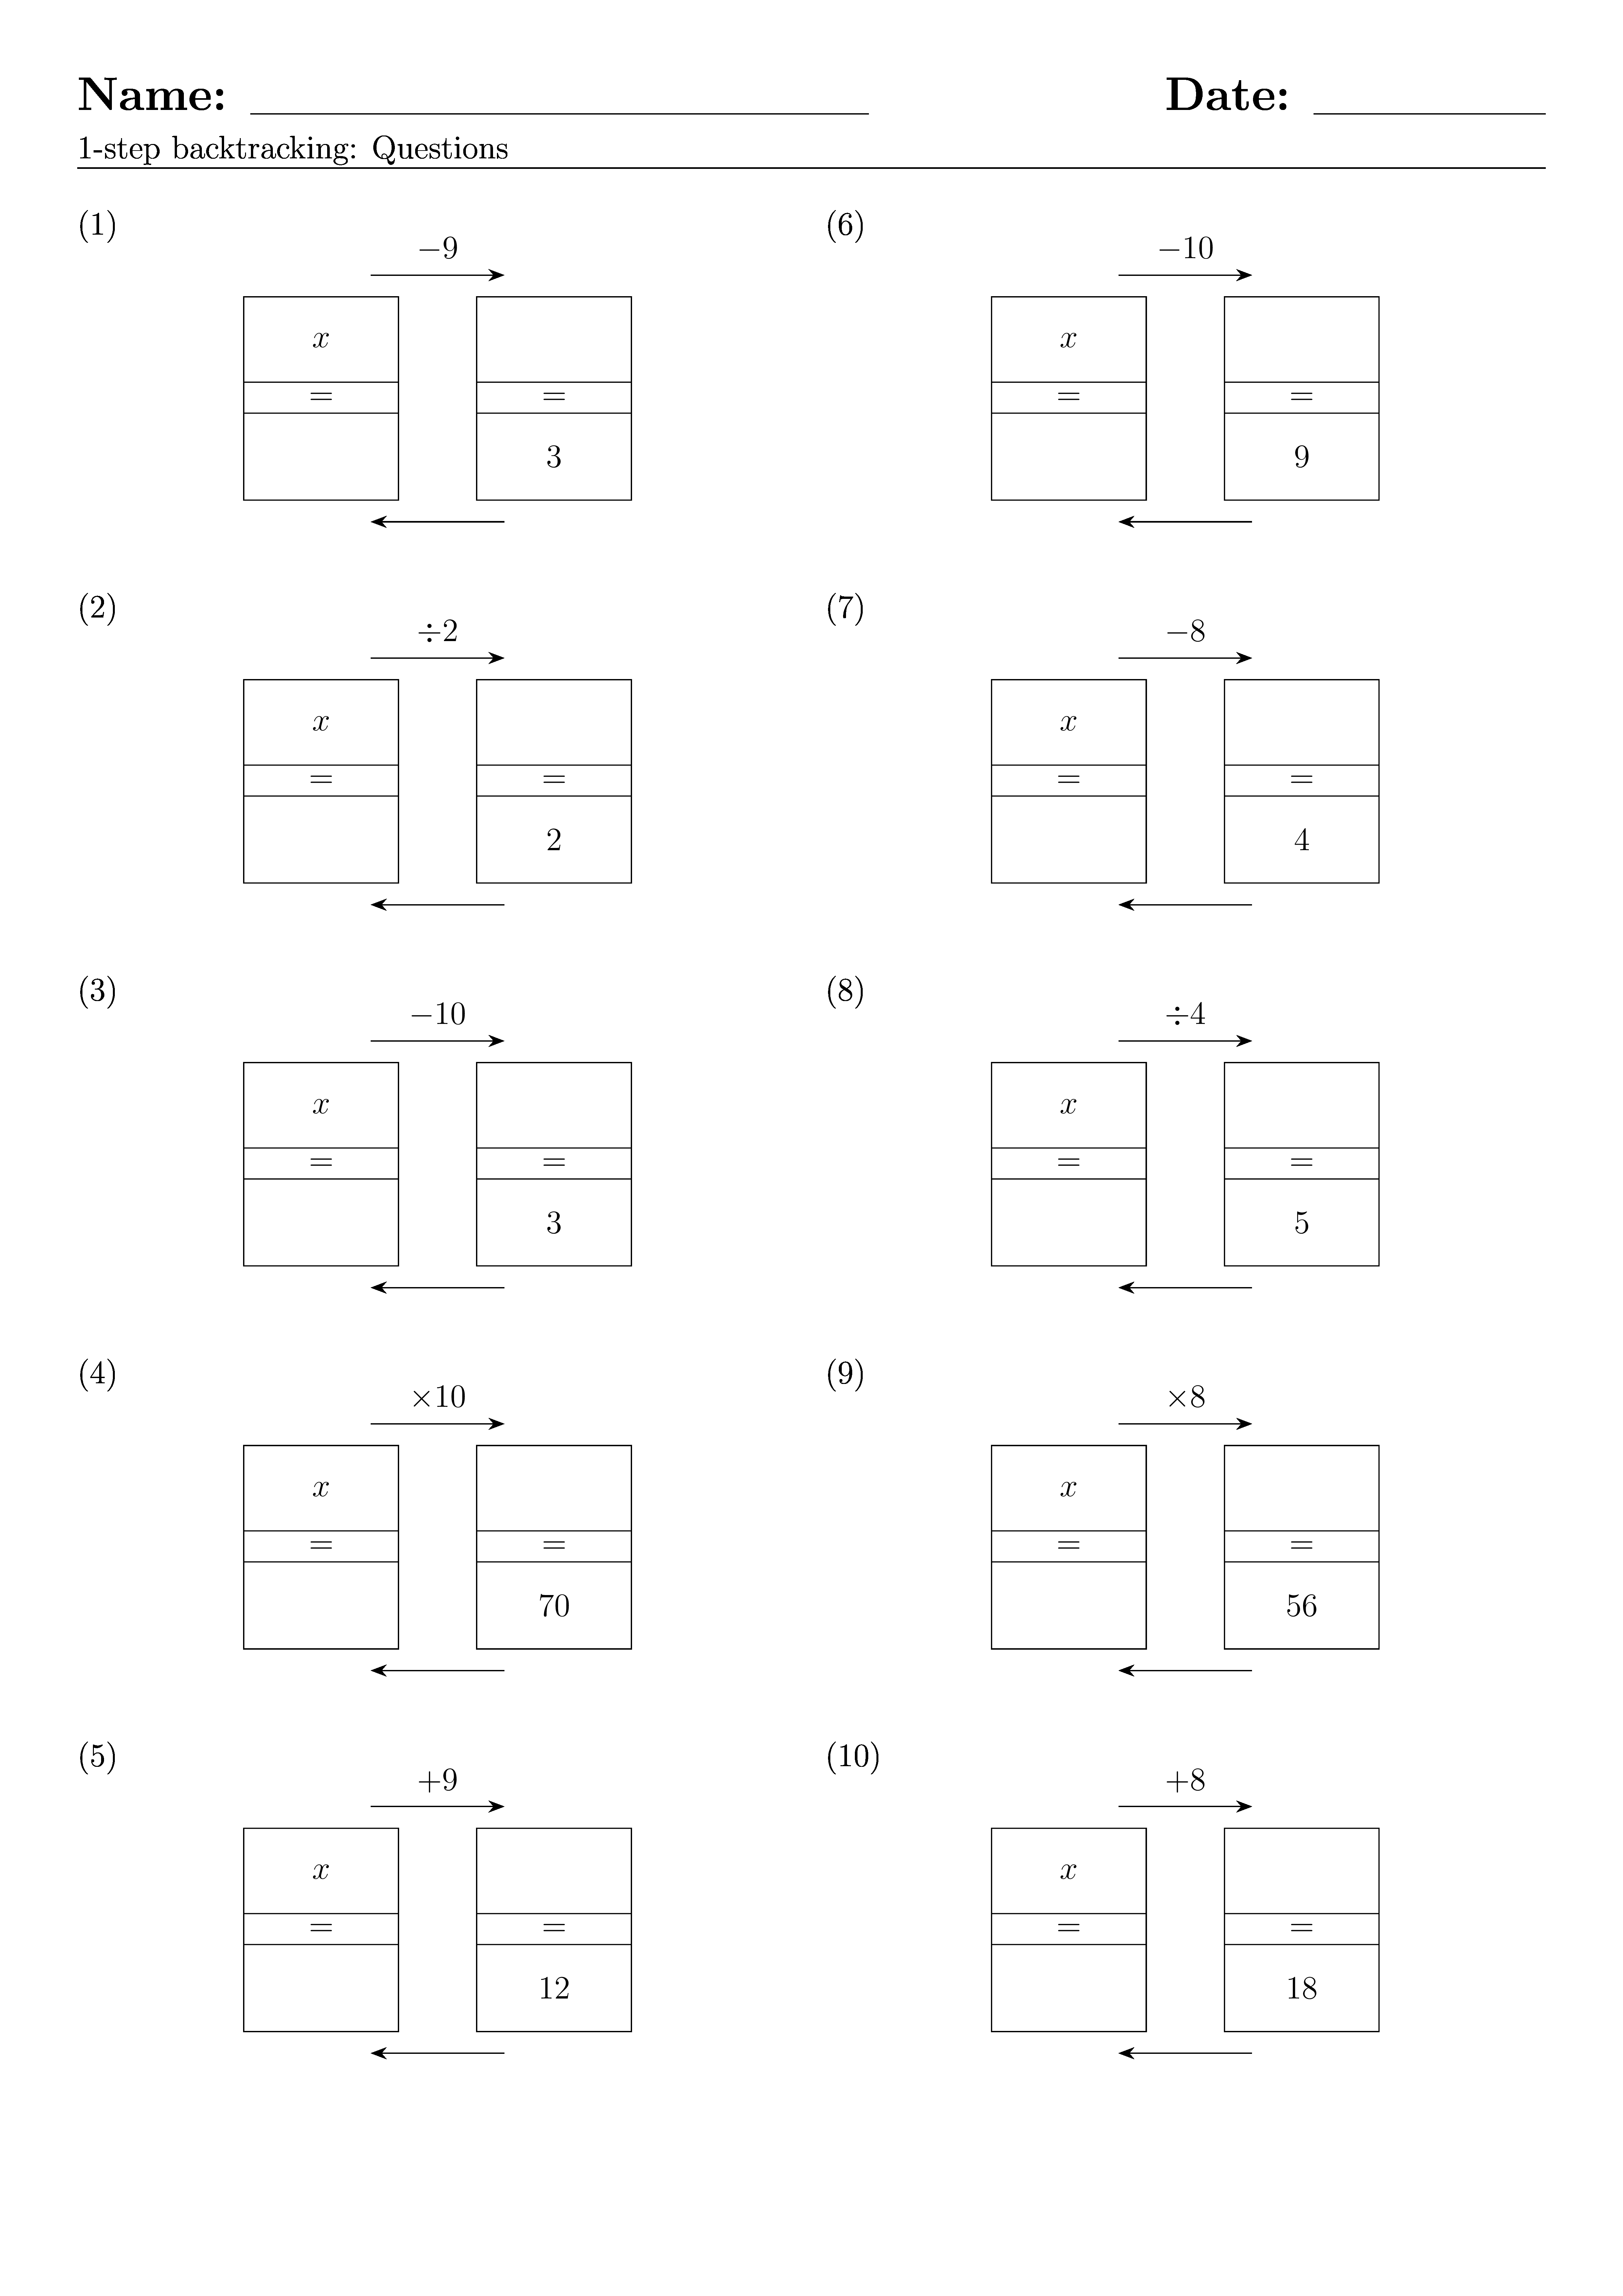
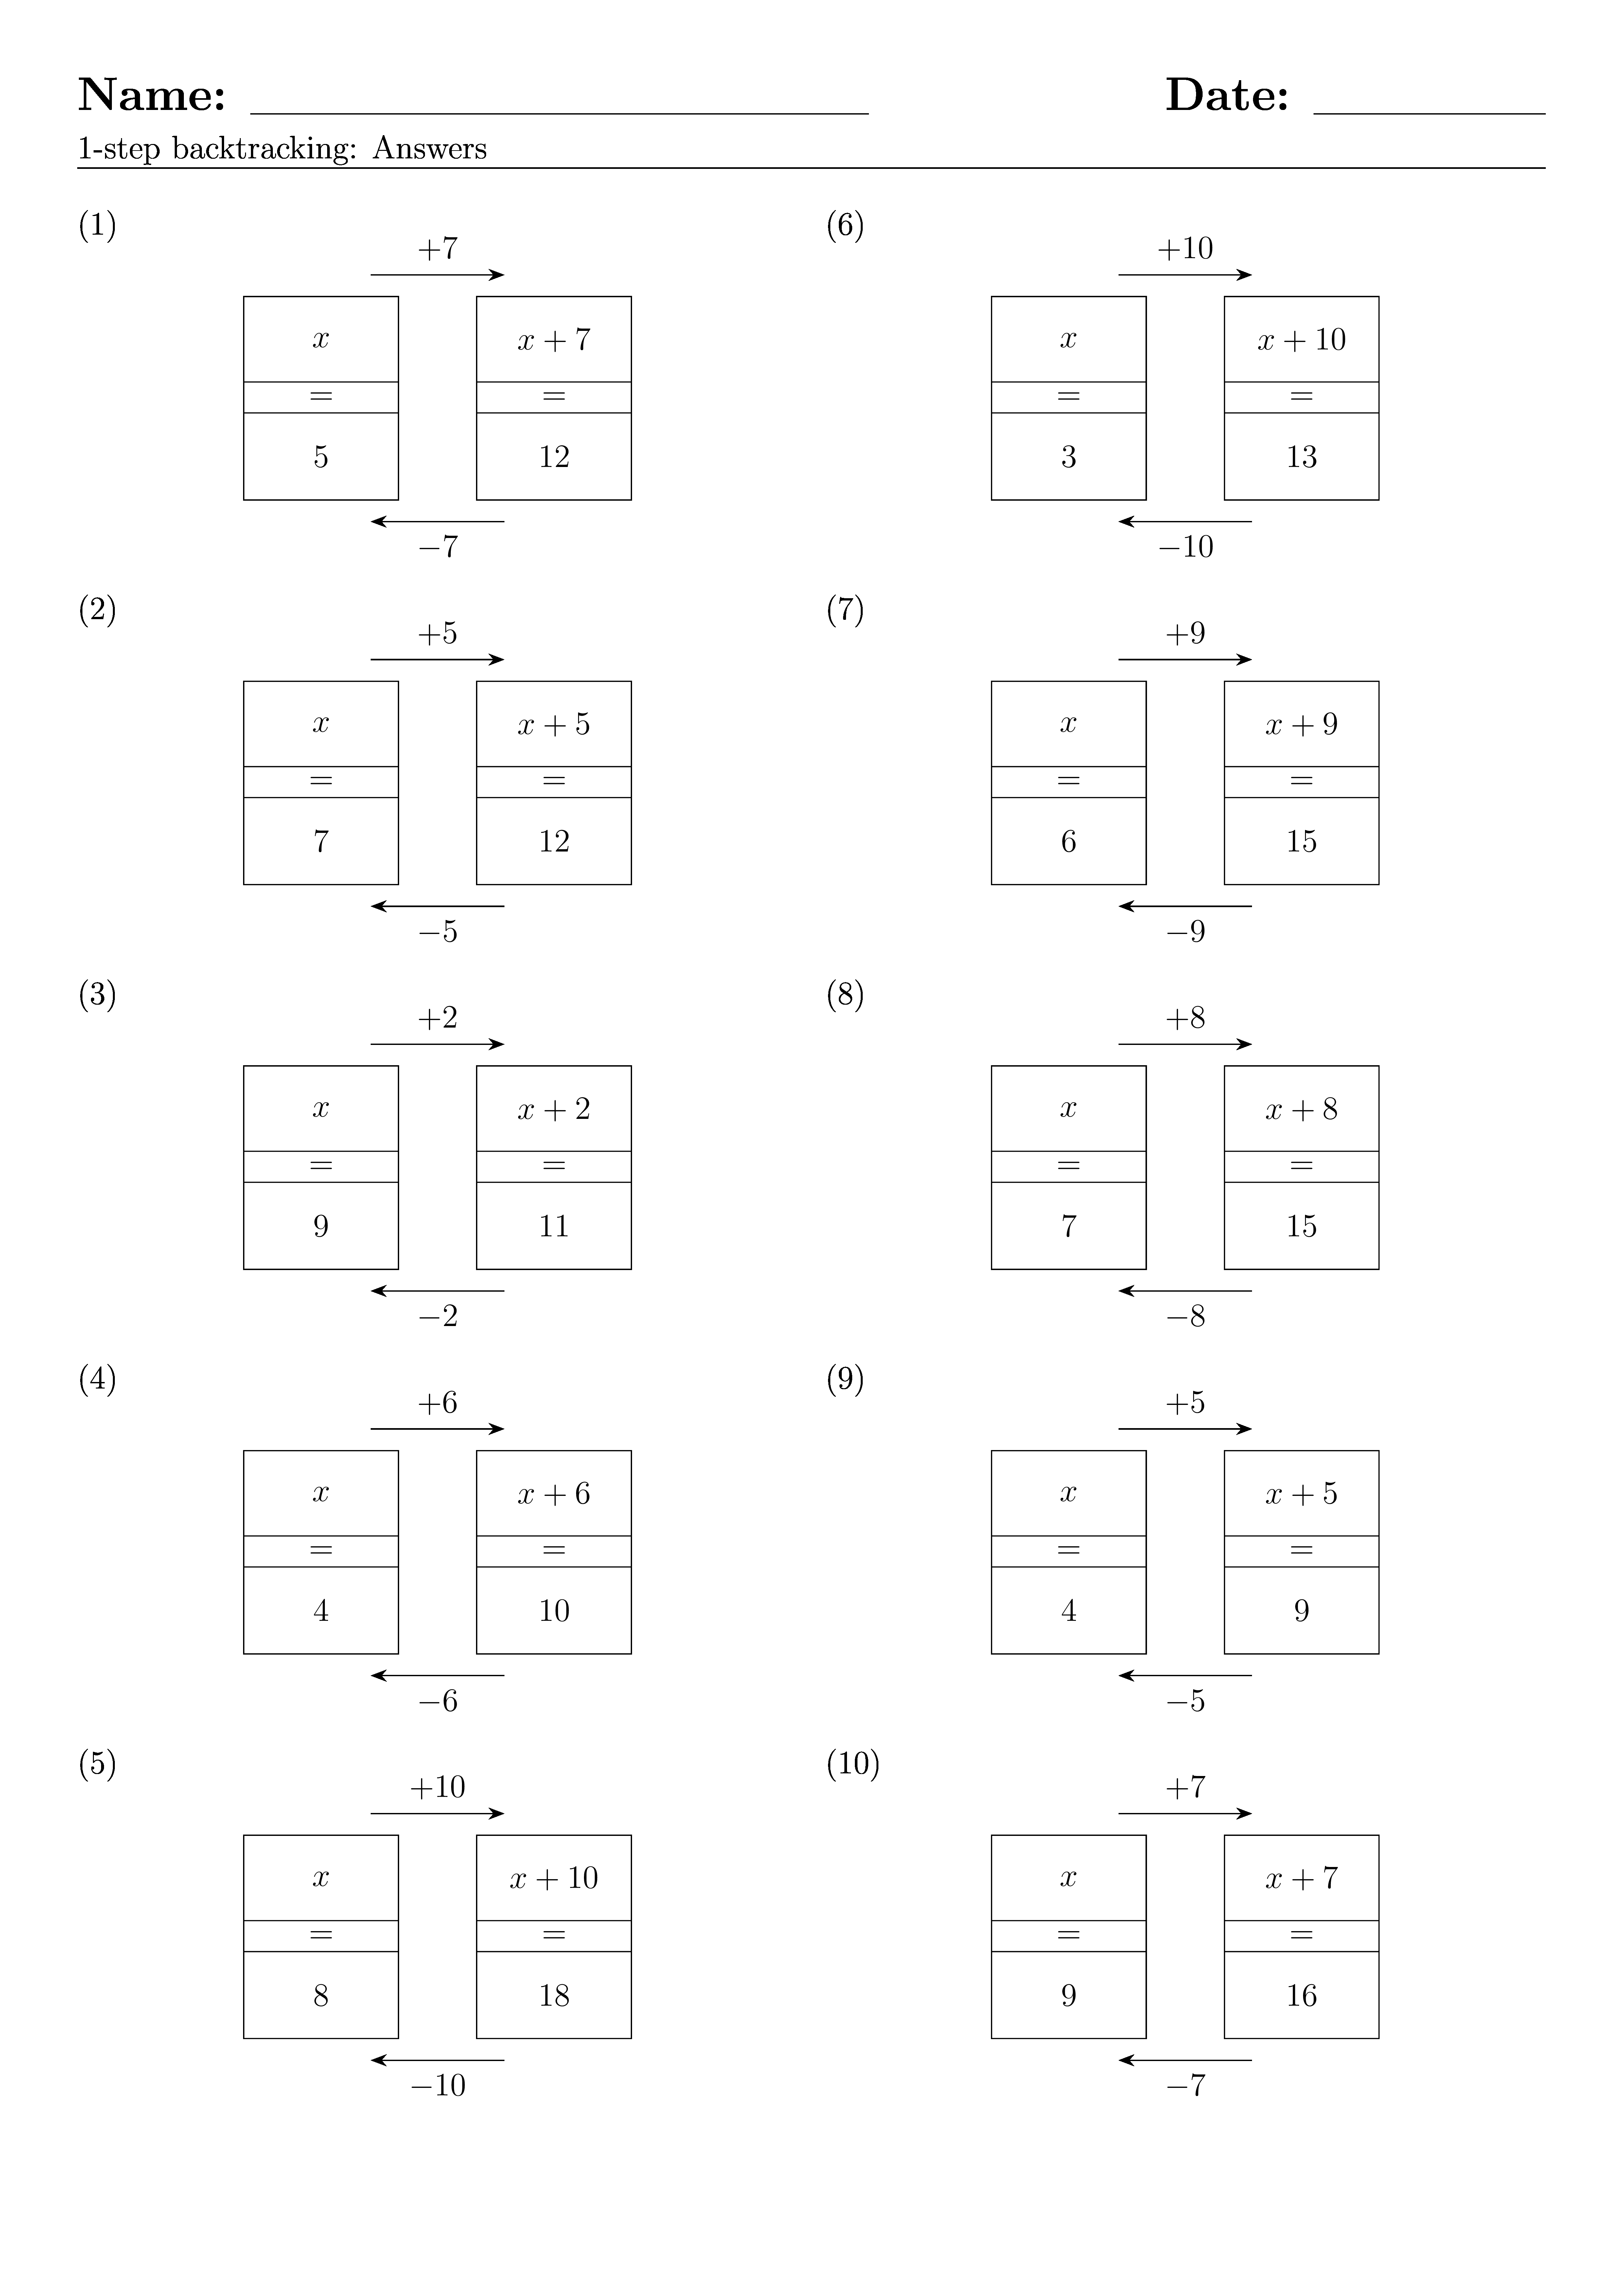
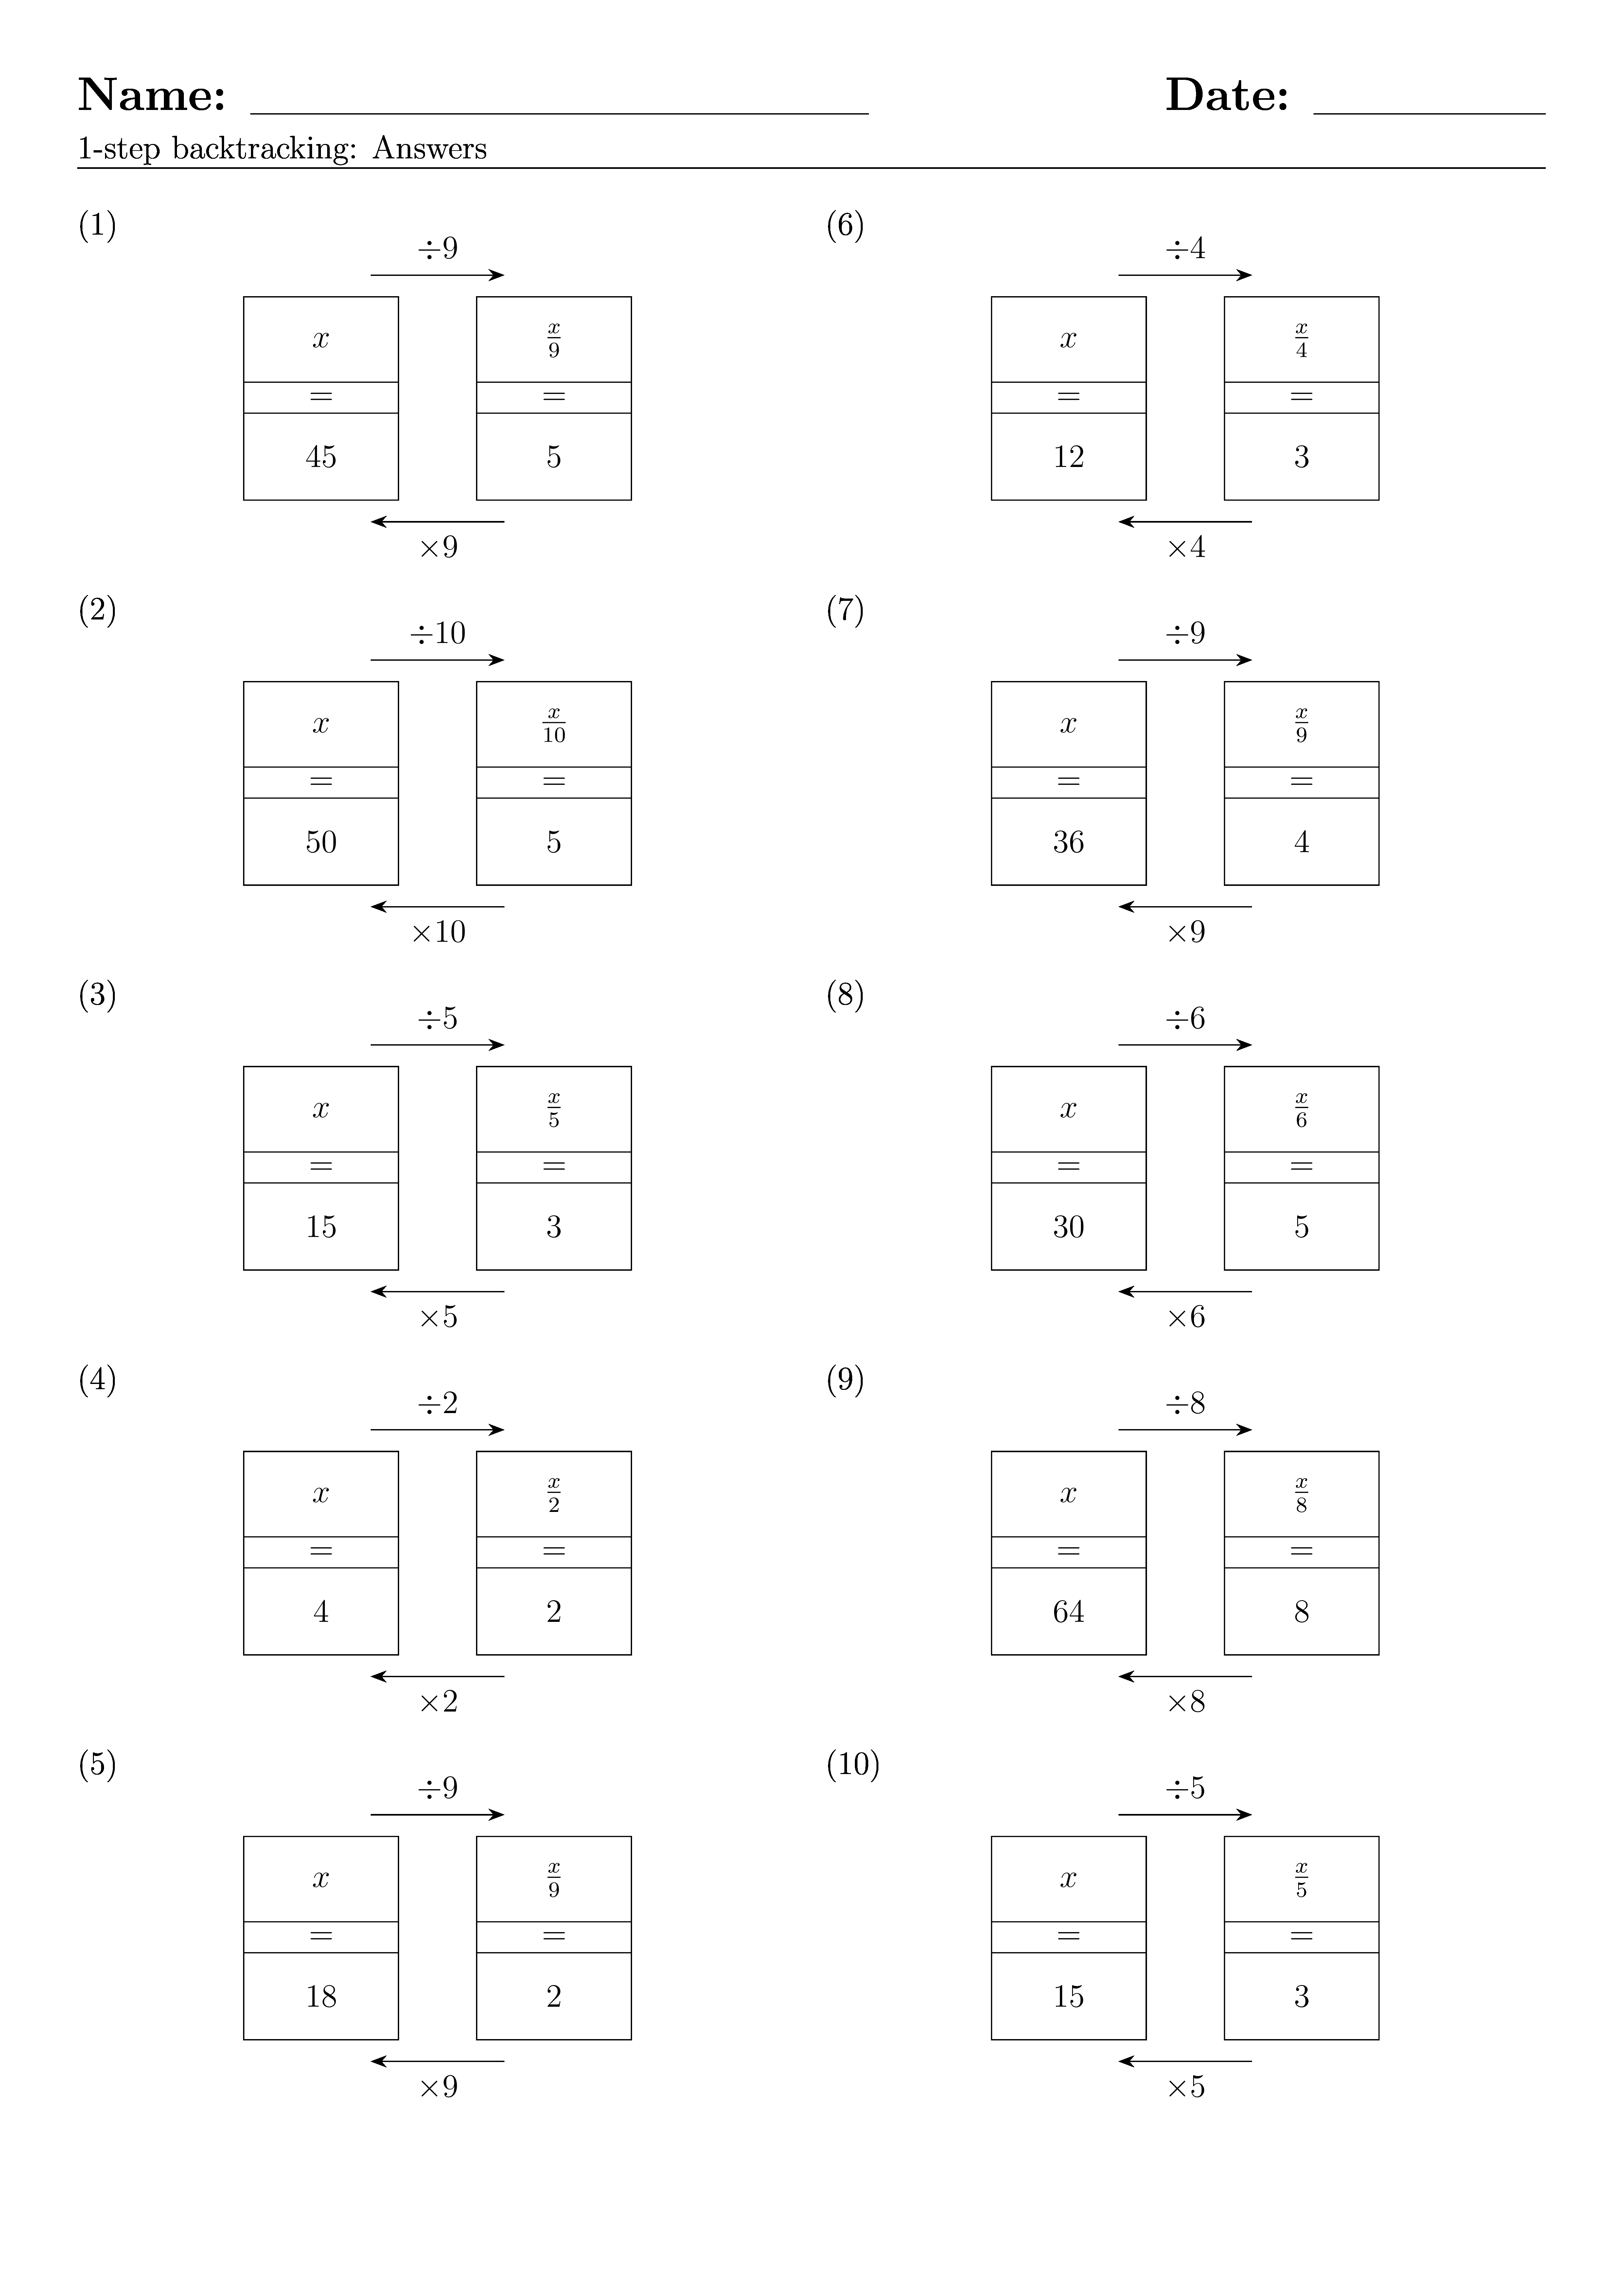
4.1. Sample 1-step backtracking worksheets by process


4.2. Splitting the LaTeX and modifying it to be built by python
The LaTeX from a single 1-step equation is used as a starting point, split into 2 and modified.
The Worksheet template contains the preamble and the scaffold for the document.
The Diagram template contains the backtacking diagram LaTeX.
4.2.1. Worksheet template
The LaTeX 1-step worksheet template is below.
 1% backtracking worksheet template
 2\documentclass[leqno, 12pt]{article}
 3\usepackage{tikz}
 4\usetikzlibrary{positioning}
 5\usetikzlibrary {arrows.meta}
 6\usepackage[a4paper, portrait, margin=1cm]{geometry}
 7\usepackage{multicol}
 8\pagestyle{empty}
 9
10\tikzset{backtrack/.style={rectangle,draw=black,fill=white,
11inner sep=2pt,minimum height=32pt, minimum width=20mm}}
12\tikzset{backtrackeq/.style={rectangle,draw=black,fill=white,
13inner sep=2pt,minimum height=12pt, minimum width=20mm}}
14\tikzset{backtrackstep/.style={rectangle,draw=none,fill=white,
15inner sep=2pt,minimum height=12pt, minimum width=20mm}}
16
17\def \HeadingQuestions {\section*{\Large Name: \underline{\hspace{8cm}} \hfill Date: \underline{\hspace{3cm}}} \vspace{-3mm}
18{1-step backtracking: Questions} \vspace{1pt}\hrule}
19
20\begin{document}
21    \HeadingQuestions
22    \vspace{-5mm}
23    \begin{multicols}{2}
24        <<col1>>
25    \columnbreak
26        <<col2>>
27    \end{multicols}
28\end{document}
\documentclass[leqno, 12pt]{article} specifies that you are working with an article document. The leqno option is used to place equation numbers on the left side of the equations instead of the right side. The 12pt option sets the font size to 12 points.\usepackage{multicol} is a LaTeX package that allows multi-column layouts in documents. It defines the multicols environment, which takes one argument that specifies the total number of columns, such as \begin{multicols}{2}.The page heading is set by:
def HeadingQuestions {section*{Large Name: underline{hspace{8cm}} hfill Date: underline{hspace{3cm}}} vspace{-3mm} {1-step backtracking: Questions} vspace{1pt}hrule}
The macro
\HeadingQuestions creates a section heading with the text “Name: “ in very large bold text with an underline, followed by an umderlined space of 8cm, followed by the text “Date: “ in bold text with an underlined space of 3cm, followed by a horizontal line.\def is a LaTeX command that defines a macro, which is a custom command that performs a specific set of actions.\HeadingQuestions is the name of the macro being defined with the \def command.The
\section* command is used to create a section heading without a number, and the \Large command is used to make the heading text very large.The
\underline command is used to add a horizontal line under its text.The
\hspace command is used to add space on both sides of the heading text.The
\hrule command is used to create a horizontal line, which separates the heading from the remainder of the document.\vspace{-5mm} is a command that adds vertical space to the document. The -5mm argument specifies that the space should be negative 5 millimeters. This means that the following text will be moved up by 5 millimeters.\begin{multicols}{2} command creates 2 columns.The
\columnbreak command is used to force a column break at that point in the document. The command works by creating a vertical white space, which is big enough to move the text from the top of the current column to the top of the next column.<<col1>> is placeholder text for the text that python will use to add the LaTeX for the backtracking diagrams in column 1.<<col2>> is placeholder text for column 2.4.2.2. Diagram template
The LaTeX 1-step diagram template for each diagram is below.
 1\begin{equation}
 2\begin{tikzpicture}[baseline={([yshift=-1pt]current bounding box.north)}]
 3
 4    \node[backtrack] (boxA) at (0, 0) {$<<boxA>>$};
 5    \node[backtrack] (boxB) [right=1cm of boxA] {$<<boxB>>$};
 6
 7    \node[backtrackeq] (boxAeq) [below=-1pt of boxA] {$=$};
 8    \node[backtrackeq] (boxBeq) [below=-1pt of boxB] {$=$};
 9
10    \node[backtrack] (boxArev) [below=-1pt of boxAeq] {$<<boxArev>>$};
11    \node[backtrack] (boxBrev) [below=-1pt of boxBeq] {$<<boxBrev>>$};
12
13    \node(boxAr) at ([yshift=24pt,xshift=5mm]boxA) { };
14    \node(boxBl) at ([yshift=24pt,xshift=-5mm]boxB) { };
15    \draw [line width=0.4pt,-{Stealth[length=2mm]}] (boxAr)  --node[backtrackstep, above=3.0pt] {$<<stepAB>>$} (boxBl);
16
17    \node(boxBrevl) at ([yshift=-24pt,xshift=-5mm]boxBrev) { };
18    \node(boxArevr) at ([yshift=-24pt,xshift=5mm]boxArev) { };
19    \draw [line width=0.4pt,-{Stealth[length=2mm]}] (boxBrevl)  --node[backtrackstep, below=3.0pt] {$<<stepABrev>>$} (boxArevr);
20
21\end{tikzpicture}
22\end{equation}
23
24
4.2.3. Question numbering
\begin{equation} and the end tag wrap around the tikzpicture so that a question number is added.\begin{tikzpicture}[baseline={([yshift=-1pt]current bounding box.north)}] moves the tikzpicture and question number so that the question number is moved to the top left (set to the left in the documentclass).The option baseline=(current bounding box.north) aligns the top of the bounding box of the TikZ picture with the baseline of the surrounding text.
[yshift=-1pt] can be modified to adjust their relative laignment at the top.4.2.4. Placeholders to be replaced by python
The line
\node[backtrack] (boxB) [right=1cm of boxA] {$<<boxB>>$} has a placeholder <<boxB>> which is replaced by python.Other placeholders are tagged by << >>.